Configuring Specifications
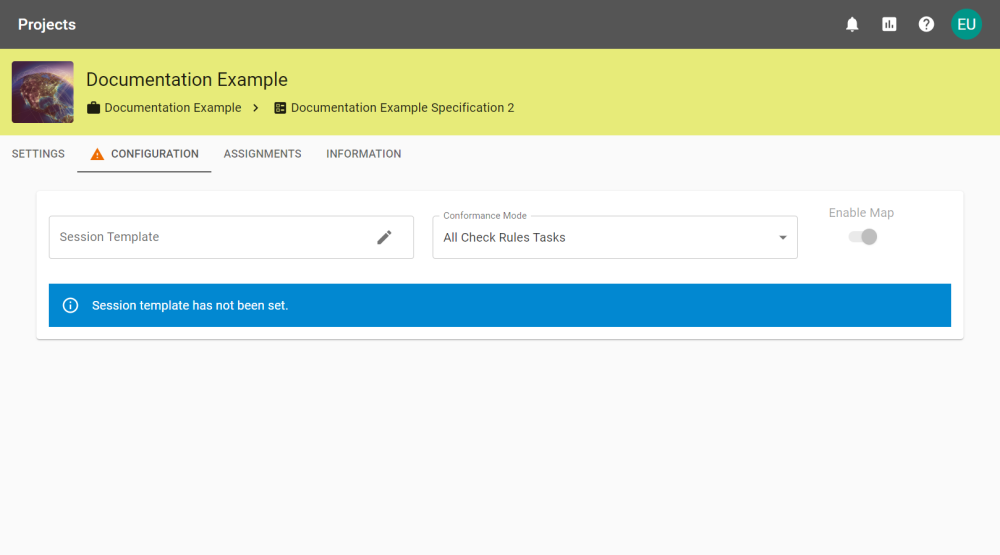
Within the Configuration tab of a Specification you can select which session template you would like to use, and configure conformance modes.
Selecting the ![]() icon in the Session Template field will allow you to choose a template to use and, once this has been selected, the relevant data stores will be available to configure.
icon in the Session Template field will allow you to choose a template to use and, once this has been selected, the relevant data stores will be available to configure.
The Enable Map toggle allows users to use the View Map feature if it is enabled. If the selected Session Template is in Production Mode, the toggle will be disabled as the Map is not available in this mode.
Navigate the file structure and choose the required template and click Confirm.
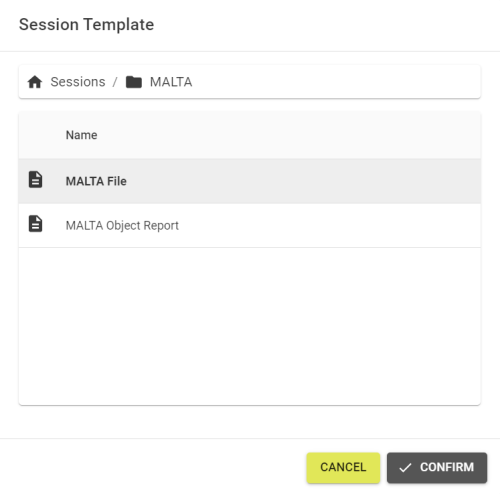
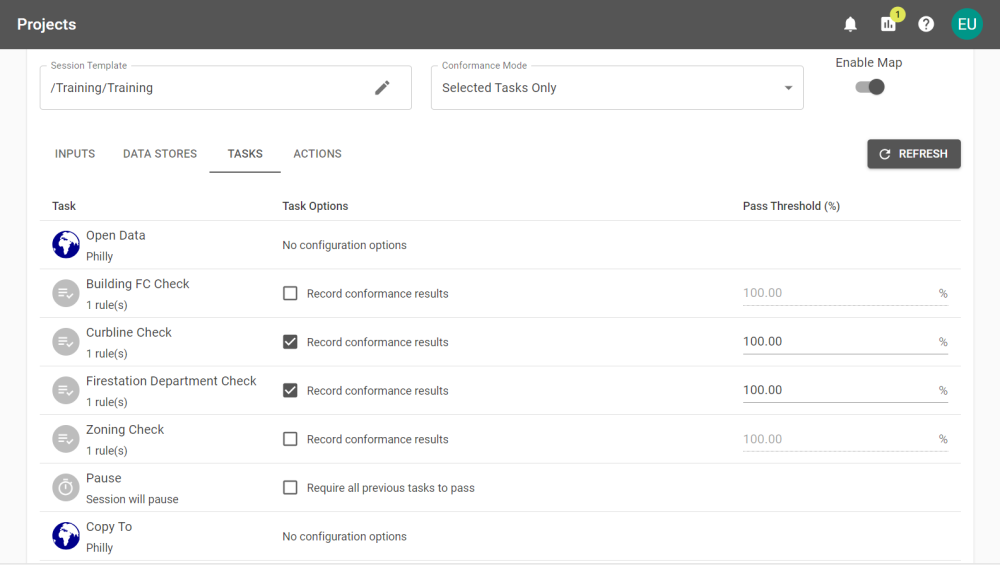
The task list will be populated by the template, where you can then configure Pass Thresholds and task options.
 Conformance Mode
The Conformance Mode sets how Tasks in a specification are verified, including setting their Pass Thresholds.
|
Conformance Mode |
Description |
|---|---|
|
All Check Rules Tasks |
Only Check Rules Tasks will be used for verification. |
|
All Tasks |
Both Rules and Actions Maps will be used for verification. |
|
Selected Tasks |
Only the selected Tasks will be used for verification. |
Inputs
After loading a Session Template all the Inputs will be added automatically. These can be reordered, removed, renamed, made to be optional, or linked to another available Data Store.

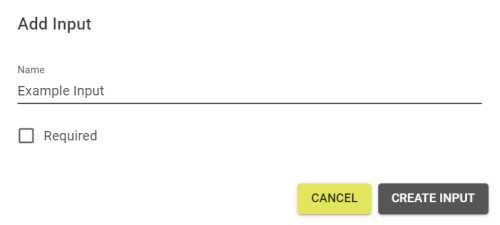
New inputs can be added by clicking the Add Input button and setting a name and whether it is required.
It can then be linked to a Data Store by clicking the ![]() button and choosing an available Data Store.
button and choosing an available Data Store.
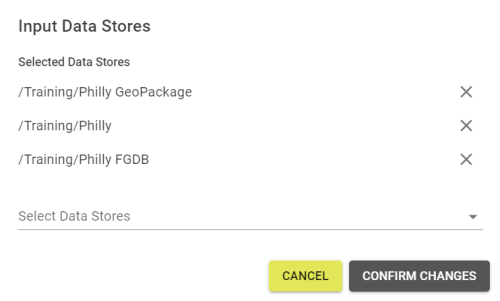
Linking multiple Data Stores to one Input will give users the choice of Data Store type to upload. It will only allow one upload per Input.
The Inputs can reordered by clicking the up and down arrows to move the selected Input up and down the ordering. This will change the order that the Inputs are displayed to Users when uploading files or configuring Schema Mappings.
Auxiliary Files
Additional files can be added to the Submission for each unlinked input. The file types are not restricted, allowing images, spreadsheets, documents, etc to be uploaded.
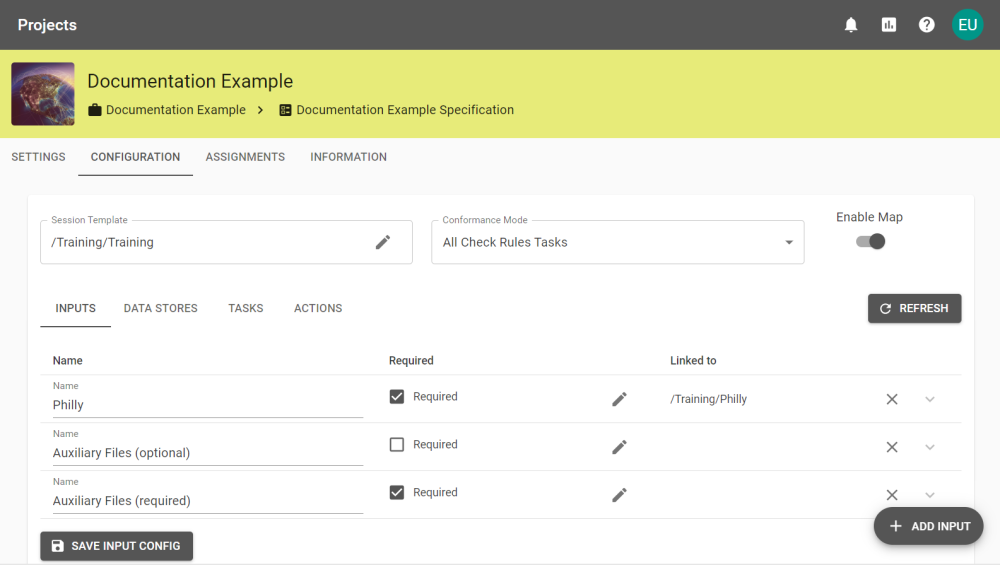
It is recommended that the input name describes what the expected auxiliary files are if they are required. All auxiliary files are available to download in the Submission Results.

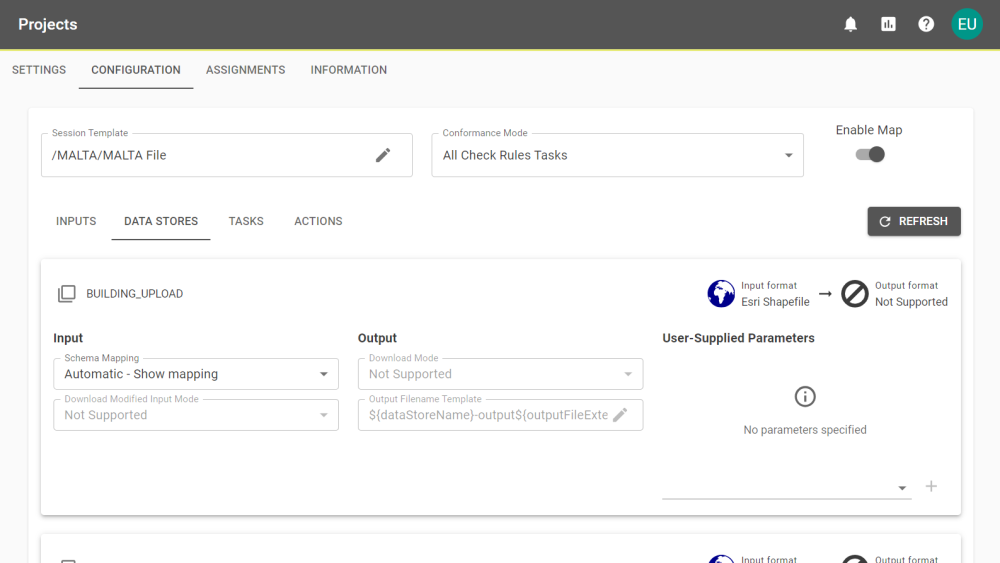
Data Stores
From here, you can decide whether to allow the upload and download of input/output data, enable/disable schema mapping, and allowing user-supplied parameters.
The Upload Mode can be set so that submissions don't require data to be uploaded before running. This will use the data that was set in the 1Integrate configuration for the submission.
|
Upload Mode |
Description |
|---|---|
|
Not Supported |
Data cannot be uploaded |
|
Optional |
Data isn't necessary but can be uploaded if needed. |
|
Required |
A file must be uploaded. |
The Schema Mapping can be set to enable or disable the automatic or manual schema mapping.
Note: If there are unmapped classes or attributes then the submission will be unable to continue unless unmapped source/target data is enabled.
|
Schema Mapping |
Description |
|---|---|
|
Automatic - Editable |
The schema is automatically mapped but allows Suppliers to edit the schema. This will also apply previously saved mappings that match the data structure. |
|
Automatic - Show mapping |
The schema is automatically mapped. Supplier users can see the mapping but cannot make edits. |
|
Automatic - Hide mapping |
The schema is automatically mapped and hidden to the supplier user, also preventing any edits to the mapping. |
|
Use source schema |
The schema of the uploaded data is used without modification. This is useful for running generic rules that don't require a specific schema, or when generating a schema validation report, see Validate Schema task details. |
The Download Modified Input Mode and Download Mode can be set to enable or disable the ability to download data.
|
Download Modes |
Description |
|---|---|
|
Downloadable |
The Modified Input/Output data can be downloaded. This also enables the Output Filename Template field. |
|
Not Supported |
Data cannot be downloaded. |
The Output Filename Template field can be edited when the Output Data is downloadable. Clicking the ![]() icon opens the Edit Output Filename popout.
icon opens the Edit Output Filename popout.
The template for the filename can be constructed using the provided variables. Clicking a variable type lists the variables associated with that type eg. Project has Project Name and Project Key.
Choosing a variable will insert it into the text field at the selected location. Multiple variables can be inserted and text, including variables, can be manually typed. Once the template is ready, click Confirm to save it.
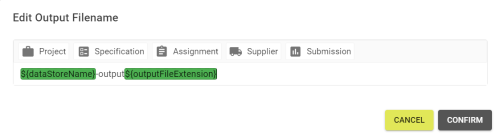
Note: Filenames can be completely static, as variables are optional. However, for clarity and best practice, this is not advised.
Adding User-Supplied Parameters allows users to edit those Data Store Parameters at the Upload Data stage. This also allows users to connect to an external Data Store.
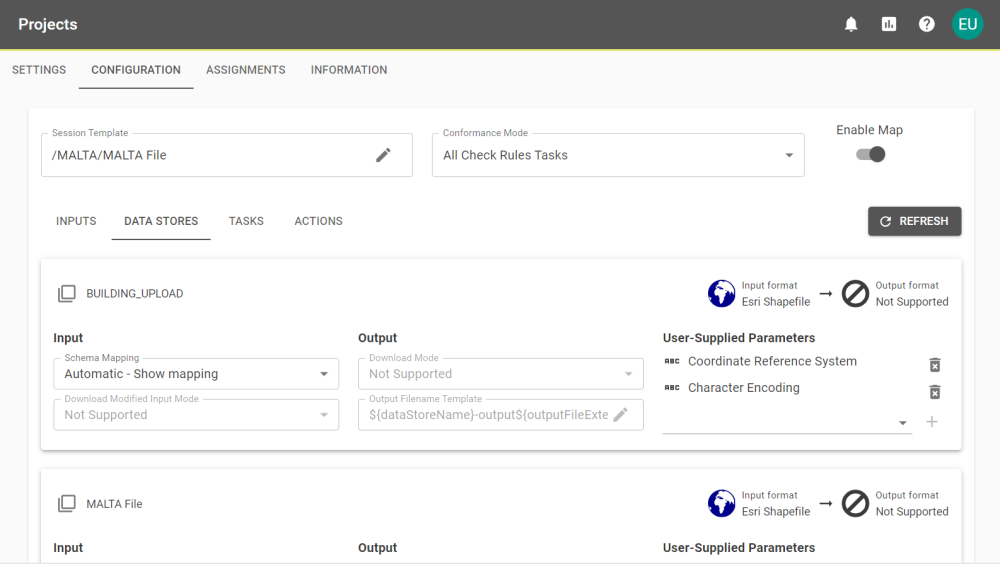
Note: Information on parameters can be found for the respective Data Stores in the 1Integrate documentation.
Tasks
This tab displays a breakdown of all tasks associated with your selected template.

If Selected Tasks Only is the chosen Conformance Mode, you can choose which Tasks will be used to confirm success or failure by selecting the Record conformance results check boxes.
|
Task |
Task Option |
Description |
|---|---|---|
|
Validate Schema |
Record conformance results
|
Enabling this allows the collection of conformance statistics and the setting of Pass Thresholds.
|
|
Check Rules |
||
|
Apply Action Map |
||
|
Pause |
Require all previous tasks to pass |
When this is enabled the submission will be automatically rejected if any previous tasks do not meet the pass threshold. |
If you have Pause tasks defined in your 1Integrate Session, you have the option to enforce pass thresholds with the Require all previous tasks to pass option. For more information about 1Integrate Sessions, please refer to the 1Integrate documentation.
Defining a Pass Threshold (%) on a task will determine the percentage of feature conformance required in order to continue a submission. The Pass Threshold (%) defaults to 100.00% and can only be edited on Tasks with the Record conformance results option enabled.
Note: You can set a Pass Threshold (%) for submissions that do not have pause tasks. This will not halt the submission process but will give a warning to the user and show the percentage of conformation.
Actions
The Actions tab allows Actions to be run after all Tasks have finished processing. These will be displayed under the heading Action Results after all other Tasks in the Submission Results and the PDF report.
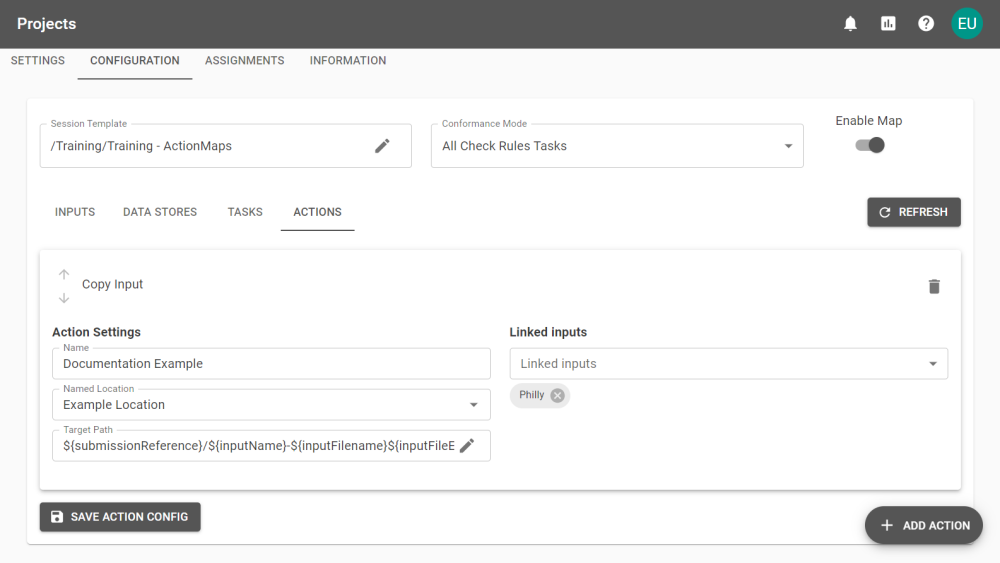
New Actions can be added by clicking the Add Action button and setting a name and the Action Kind.
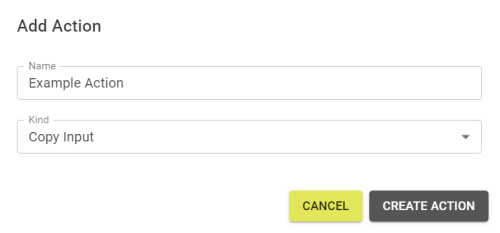
Each of the supported Actions must be configured in order to save the specification.
|
Action Kind |
Parameters |
Description |
|---|---|---|
|
Copy Input |
Name: Name of the Action. Named Location: The locations where the input will be stored. Target Path: The path where the inputs will be stored within the Named Location. Linked Inputs: The inputs processed by this action. |
Copies the selected linked inputs to the target path provided within the named location. |
Note: Named Locations must have been created previously in the System Activity tab under System.


